
.Net Developer? You should’ve learned .Net Core yesterday.
Irecently worked on a fun personal project, creating a web-based tool for client management using Asp.Net Core with Mvc. if you have already working on Asp.net Mvc framework then it will not difficult for you to understand the flow of work and if you’re new to asp.net then It’ll quite confusing.
So for the purpose of this article, We’ll explore how to create project using Asp.Net Core and Mvc with some simple steps,
Prerequisites
Visual Studio 2017 installed
.NET Core Installed
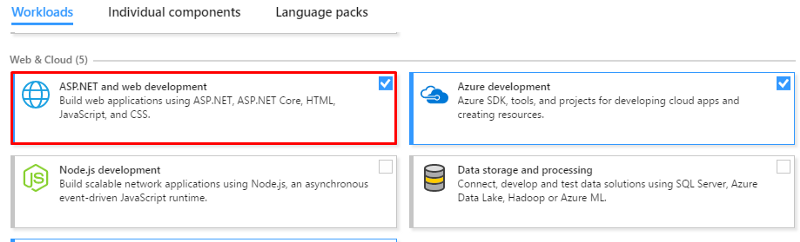
1. Download and install Visual Studio
2. Create a new project
Open Visual Studio 2017 and lets create project.
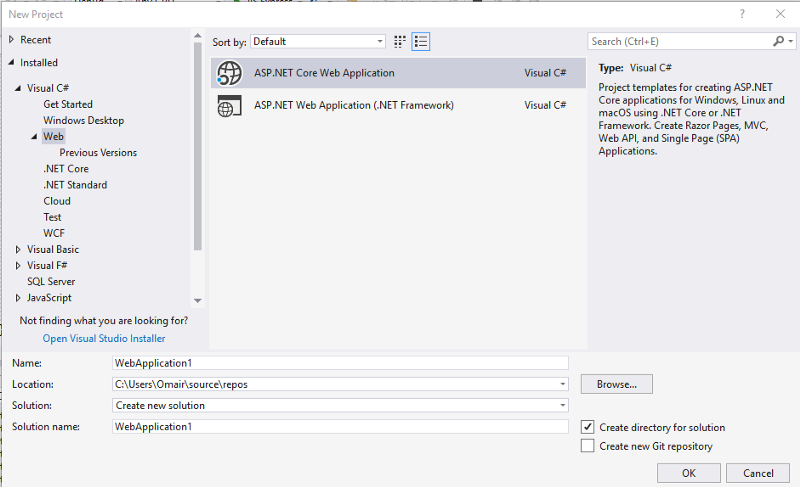
Assumes Visual Studio has been opened. Now navigate File > New > Project or (Ctrl+Shift+N). Under Visual C#, select Web template and Choose an ASP.NET Core Web application.
Choose MVC
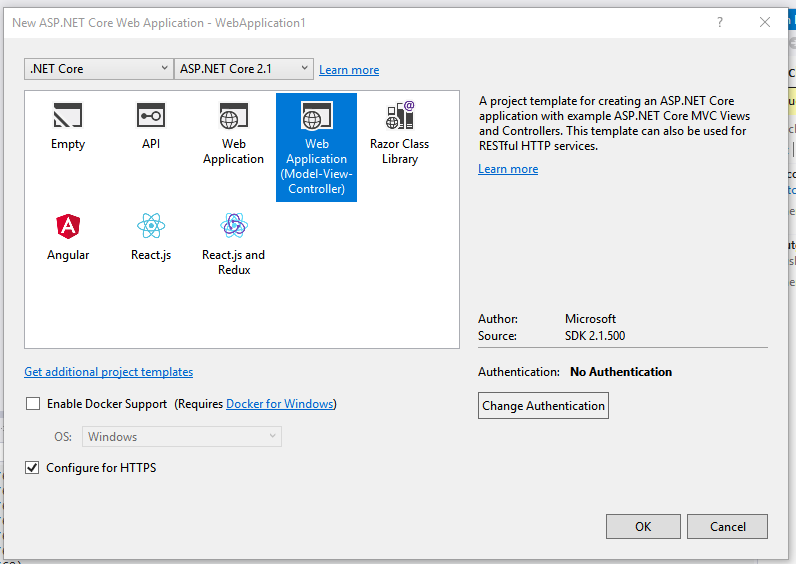
Configure ASP.NET Core
Next, we’ll install the dependencies, build project from Solution Explorer to ensure we don’t get any compile errors.
2. Use .Net Core Entity Frame to generate Database first
To create a new models from an existing DB compatible with EF Core, I loosely followed the guide here
My steps:
· Created a new Core Class Library
· Added the nuget package Microsoft.EntityFrameworkCore
· Added the nuget package Microsoft.EntityFrameworkCore.Tools
· Added the nuget package Microsoft.EntityFrameworkCore.SqlServer
· Added the nuget package Microsoft.EntityFrameworkCore.SqlServer.Design
Opened the nuget Package Manager console from visual studio Tools menu.
After Installing All above nuget packges now its time to generate database by using following nuget command.
Scaffold-DbContext “Server=MY-SqlServer; Database=DemoDb; Trusted_Connection=True” Microsoft.EntityFrameworkCore.SqlServer
-OutputDir Models
It will import all the database tables to output directory e.g. Models folder.
Modify appsettings.json file
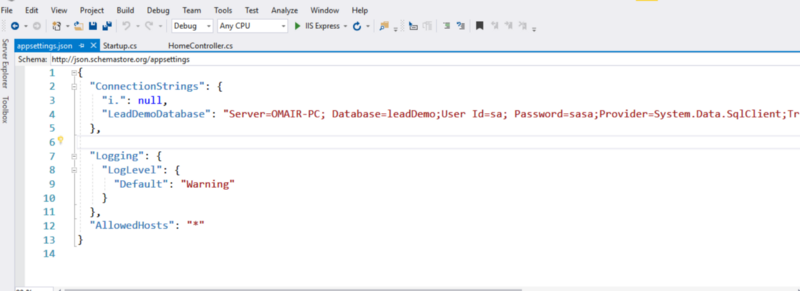
Add the following ConnectionString:
"ConnectionStrings": {
"i.": null,
"LeadDemoDatabase": "Server=MY-SqlServer; Database=DemoDb;User Id=sa; Password=sasa;Provider=System.Data.SqlClient;Trusted_Connection=True;MultipleActiveResultSets=true"
},
3. Open the Startup.cs file
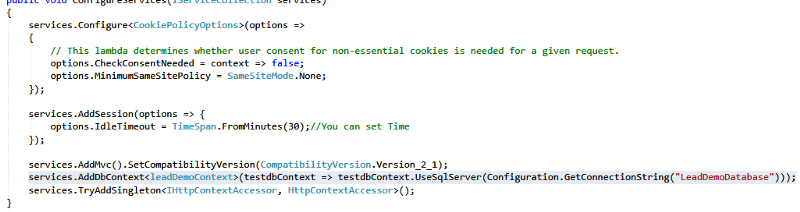
Add following into your startup.cs file
In the ConfigureServices(...) method, add:
services.AddDbContext<leadDemoContext>(testdbContext => testdbContext.UseSqlServer(Configuration.GetConnectionString("LeadDemoDatabase")));
Now you have successfully configured your database server to your .Net Core Application.
4. Create a Controller
Assumes we have AccountController and login method to login the app
5. Maintain User Session
open your startup.cs file
In the ConfigureServices(...) method, add:
services.AddSession(options => {
options.IdleTimeout = TimeSpan.FromMinutes(30);//You can set Time
});
In the Configure(...) method, add:
app.UseSession();
Now you can use sessions in your project controller to get and set sessions value.
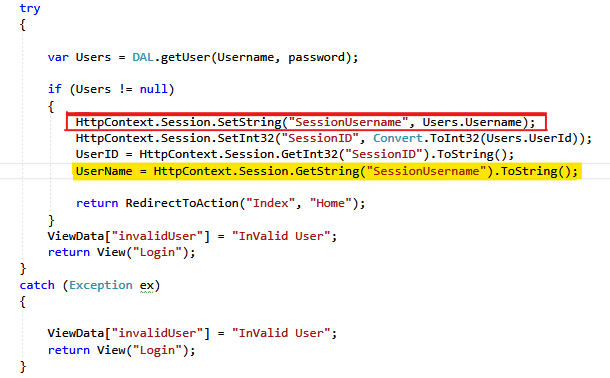
Add following before access and use sessions
using Microsoft.AspNetCore.Http;
If you’re setting httpContext.Session in one Controller and need to access that sessions from an other Controller then open startup.cs and modify.
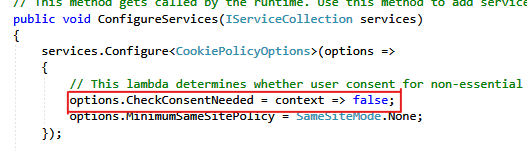
In the ConfigureServices(...) method, set to false:
options.CheckConsentNeeded = context => false;
And if you want to access your session state to your Views like cshtml file
then add the following into your cshtml
@using Microsoft.AspNetCore.Http
@inject IHttpContextAccessor HttpContextAccessor
Open your startup.cs file
In the ConfigureServices(...) method, add:
services.TryAddSingleton<IHttpContextAccessor, HttpContextAccessor>();
Now you’re ready to use like that,
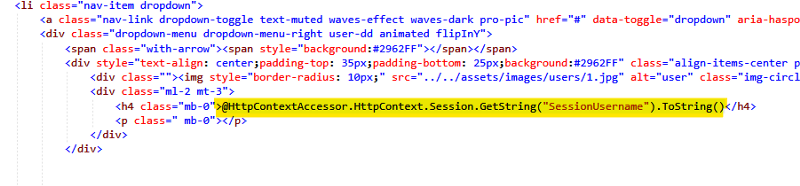
@HttpContextAccessor.HttpContext.Session.GetString("SessionUsername").ToString()
So, that’s it! now you can go ahead and make changes on your app, simply repeat the build and deploy processes whenever you want to share it with others in your organization or if you simply want to put it out there.