

All developers must be familiar with how to interact with a server for various project requirements. This server interaction varies depending on the project requirements. Some of us may just want to connect to a SQL Server database server through an application, some of us may be hosting our application to an IIS Server.
But, the number of developers who get a chance to setup and manage a server will be much less. That is the reason I thought of writing a step by step guide on this topic, especially for those who are not familiar with Server Management and Server Setup. When you are asked to set up a development server for hosting your application, it may sound scary if you have no experience in that area.
Before setting up a server as your development server, we should know our requirements first. A few things we may consider before a server setup include –
- Whether you need an on-premise server which runs on your organization’s network or you are OK with a cloud server.
- Which are the applications, you are going to install on this? what is the purpose of the server?
- How many users are going to connect to it concurrently?
- The size of the server required.
In my case, I wanted a server that runs an SQL Server 2016 with SQL Server Data Tools (SSDT) and IIS. I was fine with a cloud server, so went for Azure Server.
You may need to figure out the hardware requirements needed. For this, you can think of a few things.
- OS to be used
- Applications to be used
- Number of concurrent users
So, the next step is to identify the Operating System you may need. In my case, it was Windows Server 2012 R2.
In most cases, your IT team will install the OS and the necessary network settings are done for you.
- Choose Virtual Machines.
- Choose the region, OS, CPU/Memory configuration etc.
- The amount will be shown for each item you choose.
- By default, the amount will be in dollars. You can change it to the currency of your choice.
In my case, for running an SQL Server and an IIS server, a 4 cores processor with 7 GB RAM was fine. You will get a certain amount of hard disk space for free for the configuration. You can scale up later and it will be charged accordingly.
Increasing the hard disk space is easier than adding more cores and RAM.
CONNECTING TO THE SERVER
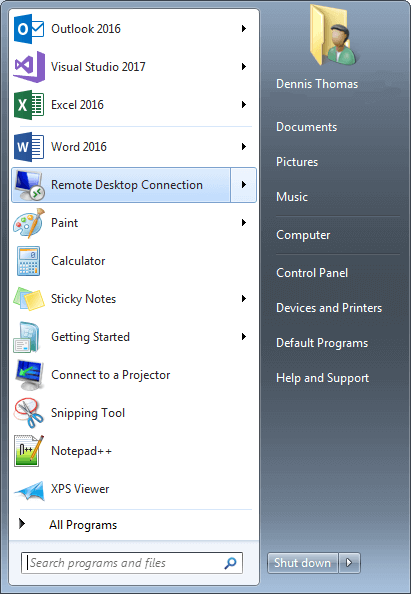
If your server has RDP enabled, you will be able to connect to it using Remote Desktop Connection from your local machine. Open the Remote Desktop Connection wizard from the Start menu.
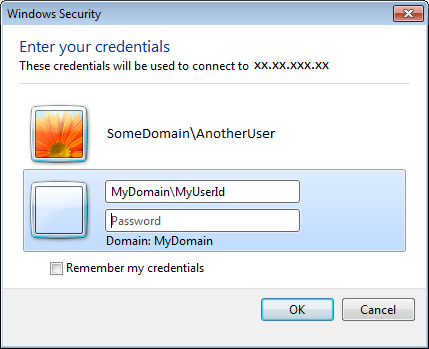
Type your server’s IP for the Computer field.
Give your username prefixed with your domain. For eg: DOMAIN\{USERID}
Give your password in the password field.
For Security reasons, some organizations will not allow direct access to your server. Instead, they may ask you to connect to a terminal server and from there, you will have to start another remote desktop connection session to connect to your actual server.
Once you have connected to your server, you will be welcomed by Server Manager page.
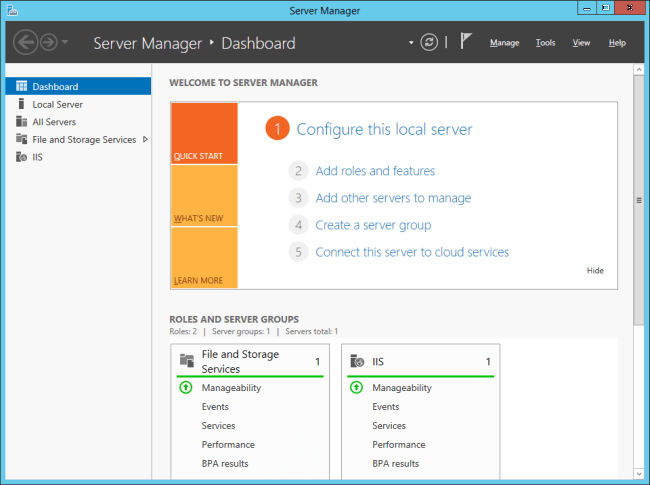
It displays the server roles and you can manage them and many things like installing new Windows features etc.
For installing IIS, you can follow the below steps.
On the Server Manager welcome screen, click on the “Add roles and features”; you will get a new “Add Roles and Features” Wizard.

Click “Next”.
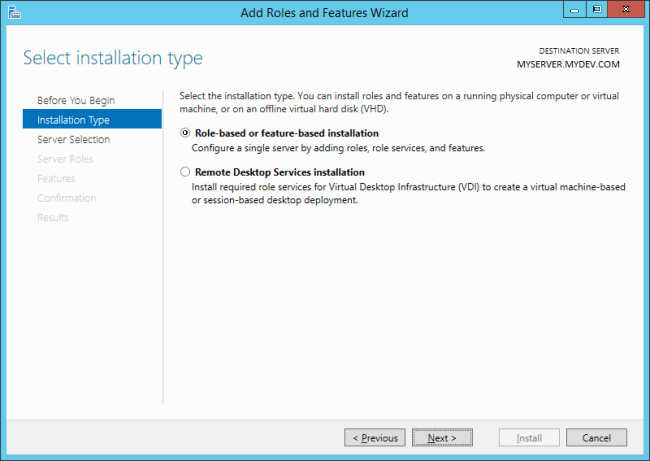
The role-based or feature-based installation will be selected by default, otherwise, select it and click “Next”.

If you have multiple servers, choose the one you want, otherwise, you server will be selected by default. Click “Next”.
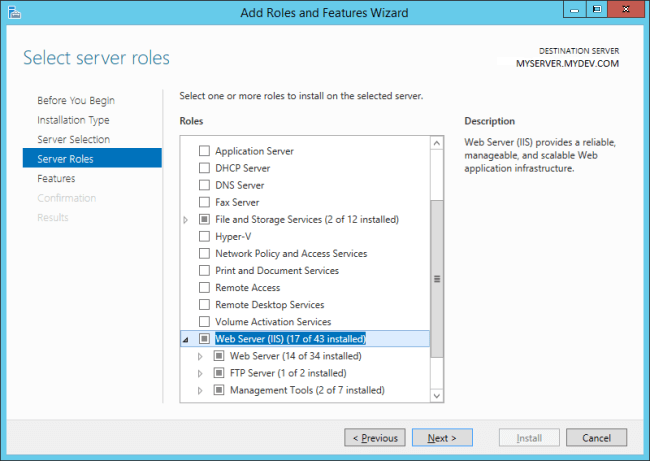
Select Web Server (IIS) from the list. You can choose one or more server roles from the list and click “Next”.
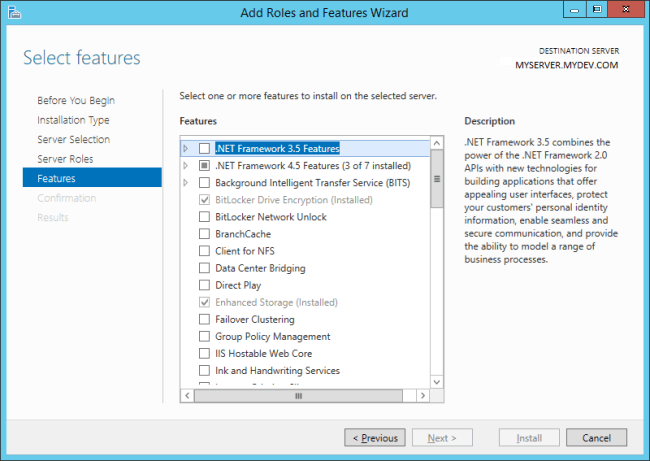
Choose the required Windows features from the list and click “Next”.
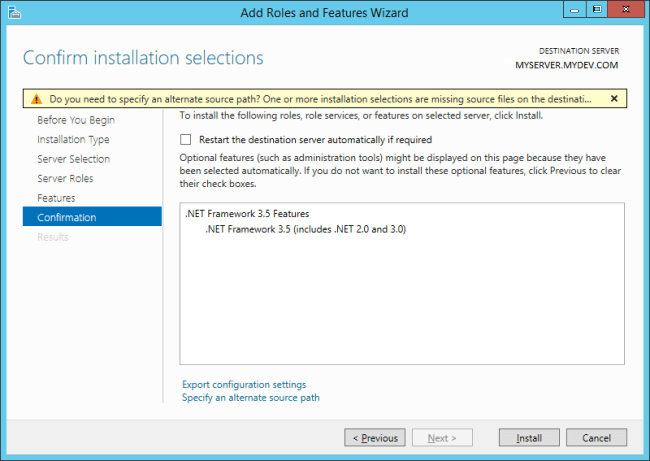
Click Install. The IIS and the required features will be installed on your server.
Installing SQL Server is like installing an application on a desktop using a setup wizard. Since I wanted SQL Server Reporting Services, I also selected the SQL Server Data Tools (SSDT) from the checklist available while installing. You can choose SSRS, SSIS, SSAS etc. and the installer will install the selected packages for you. Installing SSRS will install Reporting Manager on the server which will help you host reports on the server where you Database is running. Report Manager works like kind of a website that can run on the server where the SQL Server database is running. So, from version 2008 onwards, SSRS can run independently without having an Internet Information Services (IIS).
Once you have installed IIS, if you are missing any components, you can get it installed using Web Platform Installer.
First, you need to download the Web Platform Installer (WPI) and install it on the server.
I installed Web Platform Installer (WPI) 5.0 as it was the latest.
After installing, open the WPI.
Type the name of the feature you want to install in the search box.
I wanted to install Web Deploy on my IIS.
Web Deploy is mainly used in two scenarios,
- It helps developers to publish a compiled web application from Visual Studio to IIS.
- To migrate a website from an Operating System (OS) running an older version of IIS, say 6.0, to an OS running the latest IIS say 8.5.
Web deployment is faster than FTP and secure than XCOPY as it supports transfer over HTTPS.
You can either search Web Deploy in the search box and install it.
But if you choose to install Web Deploy, the dependencies required for Web Deploy may not be installed.
So, the better option is to install the Recommended Server Configuration for Web Hosting Providers.
In WPI, type “Recommended” in the search bar in the upper-right hand corner and press Enter.
Choose Recommended Server Configuration for Web Hosting Providers from the search results
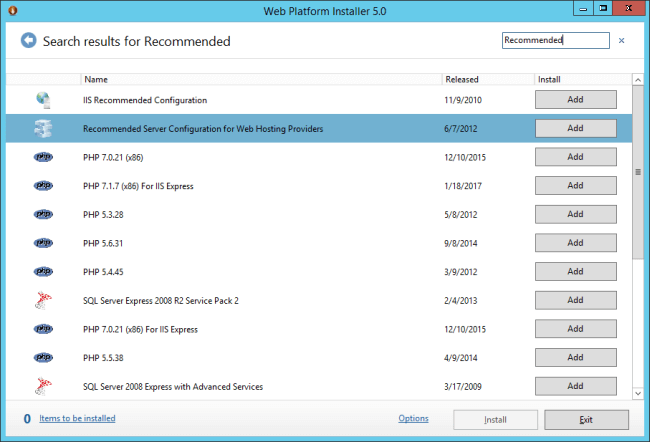
Click Add
Then click Install.
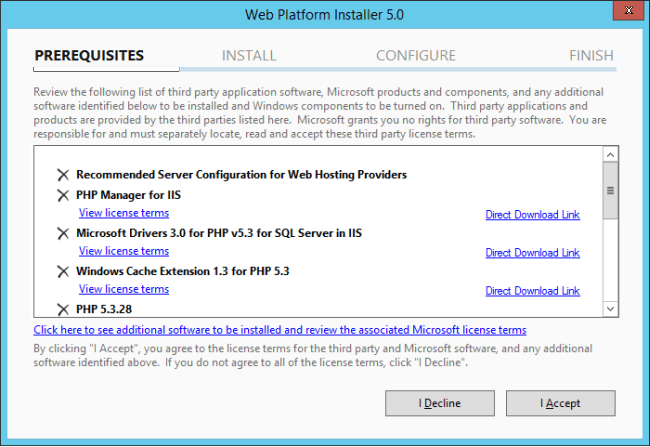
Click on I Accept
The feature will be installed.
You can use WPI to install various development tools and their dependencies that are part of Microsoft Web Platform.
If you host an application and you want to browse it from your local machine, URL browsing should be enabled on the server.
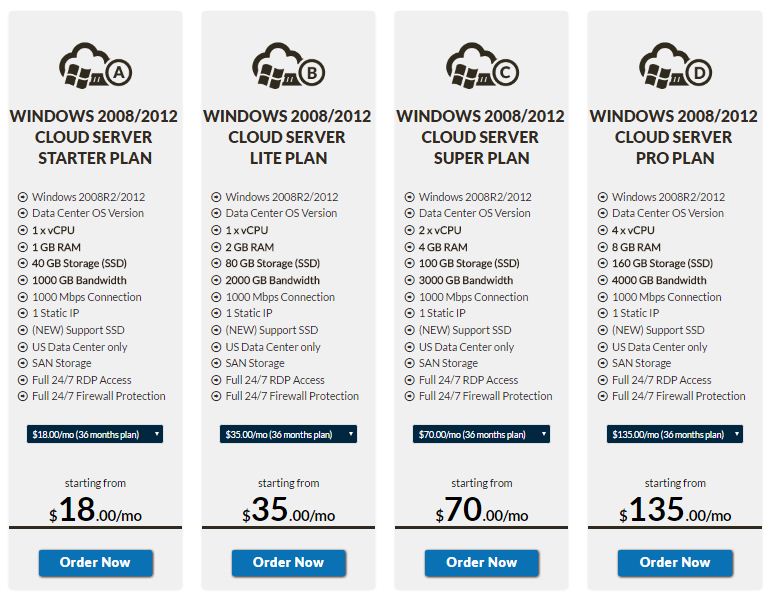
BEST AND CHEAP WINDOWS DEDICATED CLOUD SERVER START FROM $18.00
Are you looking Windows dedicated cloud server with affordable price? As the leader of Windows ASP.NET hosting provider, ASPHostPortal offers the best, reliable and cheap Windows dedicated cloud server. Their Windows dedicated cloud server plan is starting from $18.00/mo only. This is the best price ever for a reliable Windows dedicated cloud server.
WHY ASPHOSTPORTAL IS THE BEST AND CHEAP WINDOWS DEDICATED CLOUD SERVER PROVIDER?
A Windows dedicated cloud server is the perfect solution for growing websites. ASPHostPortal’s Windows Cloud Servers provide scalability, redundancy, and flexibility. A Cloud Server allows you to start small, and scale resources as needed.
SAFE AND RELIABLE WINDOWS DEDICATED CLOUD SERVER
High availability is built-in to the architecture of their cloud servers. This means any hardware can fail. Be it storage, compute or network components, without the cloud servers actually being impacted. Full redundancy is engineered into their cloud platform. Cloud servers are automatically moved to other hardware and hosts if anything fails, to ensure maximum safety and performance.
EXPERT SUPPORT TEAM
They provide 24/7 support via ticketing system for all urgent issues. This means that regardless of the time of day, you will always be helped by qualified support engineers. This ticketing support system is included free of charge for all their customers and partners. They believe that the reliability of your cloud servers should always be their highest priority and therefore they don’t charge for assisting you with any issue relating to their cloud infrastructure.
UPTIME
Their high availability, highly-redundant infrastructure comes with built-in redundancy. Utilize the benefits of having your cloud environments in multiple datacenters. Merger of snapshots won’t cause you downtime – meaning no need for a restart while a virtual machine is running. They’re disaster recovery-friendly and offer a 100% uptime SLA.
CLOUD SERVER BENEFITS
- Freedom to modify all the server software to your needs. This includes the operating system kernel which is not always the case with other virtualization solutions such as private virtual servers.
- Stability and security because a software problem is isolated from and to your environment. Others’ cloud servers can’t harm you and you can’t harm others. Also, if other users overload their cloud servers this will have no impact on yours because resources are dedicated and your stability is guaranteed. In addition to that cloud servers don’t suffer from hardware problems as previously said.
- Cloud servers probably hold the best stability / cost ratio performance. They do not suffer from the usual server hardware problems and they have all Cloud computing, benefits, i.e. they are stable, fast and secure.
- On the other hand, cloud servers are economically more efficient than the standard dedicated servers. For a similar price, with cloud servers you will receive more resources and your server will be faster. In web hosting terms, your site will run faster on a cloud hosting server if you compare it to a traditional server with similar price.
- In this regard we should also mention that cloud servers scale very well. It is very easy and fast to add upgrades (CPU, Memory, disk space) to a cloud server just as it is more affordable, of course.