

What is SSL and Let’s Encrypt?
Every internet user shares lots of personal information each day. We do that when shopping online, creating accounts, signing into different websites, etc.
If not properly encrypted, then this information can be spied upon and stolen. This is where SSL comes in. It provides the encryption technology to secure the connection between a user’s browser and the web server.
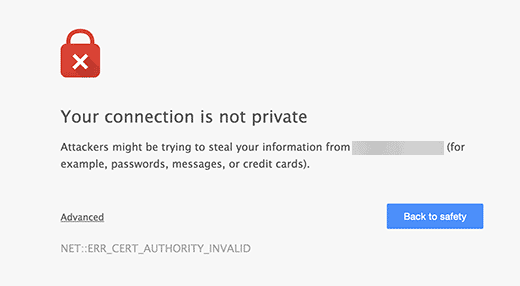
Each site is issued a unique SSL certificate for identification purposes. If a server is pretending to be on HTTPS, and it’s certificate doesn’t match, then most modern browsers will warn the user from connecting to the site.
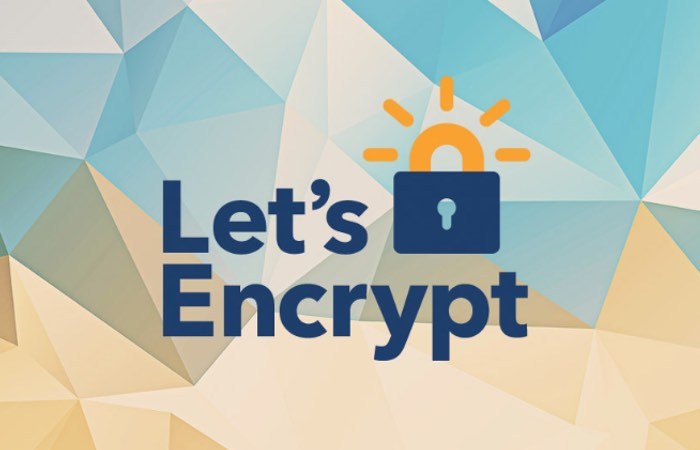
Let’s Encrypt is a free open certificate authority that aims to provide SSL certificate for general public. It is a project of Internet Research Group, a public service corporation. Let’s Encrypt is sponsored by many companies including Google, Facebook, Sucuri, Mozilla, Cisco, etc.
Having said that, let’s take a look at how you can add free SSL certificate to your WordPress site with Let’s Encrypt.
Easy Way – Using a Host That Offers Built-in Free SSL
As Let’s Encrypt is becoming popular, some WordPress hosting companies have already started offering built-in easy SSL set up.
The easiest way to add Let’s Encrypt free SSL to WordPress is by signing up with a hosting company that offers a built-in integration.
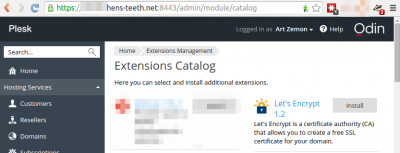
Setting up Free SSL with Let’s Encrypt on ASPHostPortal
ASPHostPortal is one of the most trusted and well-known hosting companies offering built-in integration of free SSL.
Here is how to enable Let’s Encrypt free SSL in ASPHostPortal.
Step 1: Go to the Extensions Catalog and install the Let’s Encrypt extension.
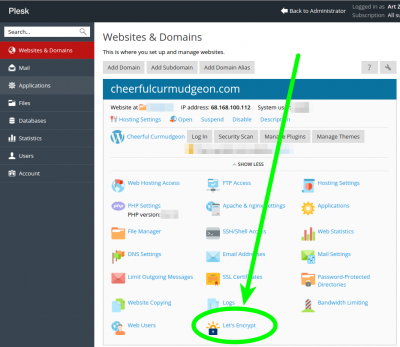
Step 2: Navigate to your website within Plesk and click the Let’s Encrypt button.
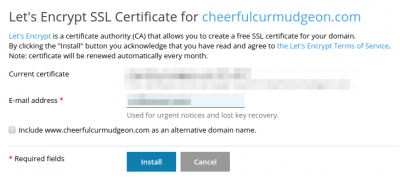
Step 3: Click the Install button.
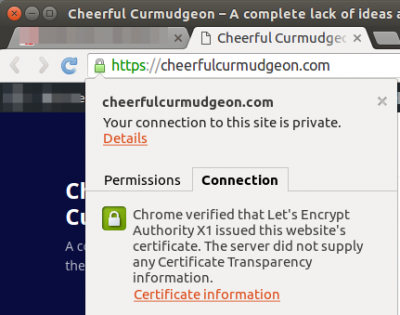
Done! You can confirm that the website is encrypted by clicking on the green padlock.
That’s all, you have successfully integrated Let’s Encrypt free SSL to your WordPress site.
However, your WordPress site is not yet ready to use it. First, you will need to update your WordPress URLs and then fix insecure content issue.
Don’t worry we will show you how to do that. Skip to the section on updating URLs and fixing insecure content issues.
Updating WordPress URLs After Setting up SSL
After setting up the Free SSL certificate with Let’s Encrypt, the next step is to move your WordPress URL from HTTP to HTTPS.
A normal site without SSL certificate uses HTTP protocol. This is usually highlighted with http prefix in web addresses, like this:
http://www.example.com
Secure websites with SSL certificates use HTTPS protocol. This means that their addresses look like this:
https://www.example.com
Without changing the URLs in your WordPress site, you will not be using SSL and your site will not be secure for collecting sensitive data.
Having said, let’s see how to move WordPress URLs from http to https:
For Brand New WordPress Website
If you are working on a brand new website, then you can just go to your WordPress admin area and click on settings. There you will need to update the WordPress URL and Site URL fields to use https.
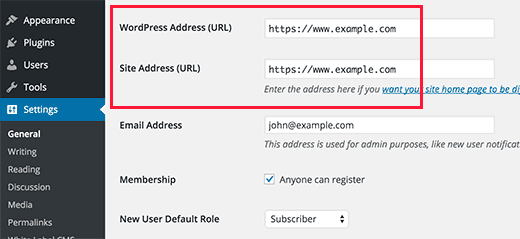
Don’t forget to save your changes.
For Existing WordPress Sites
If your site has been live for a while, then chances are that it is indexed by search engines. Other people may have linked to it using http in the URL. You need to make sure that all traffic is redirected to the https URL.
First thing you need to do is install and activate the Really Simple SSL plugin. For more details, see our step by step guide on how to install a WordPress plugin.
The plugin will automatically detect your SSL certificate and set up your website to use it. In most cases, you will not have to make any more changes. The plugin will also fix insecure content issue.
Update Google Analytics Settings
If you have Google Analytics installed on your WordPress site, then you need to update its settings and add your new url with https.
Login to your Google Analytics dashboard and click on ‘Admin’ at the top menu. Next, you need to click on property settings under your website.
There you will see the default URL option. Click on http and then select https.
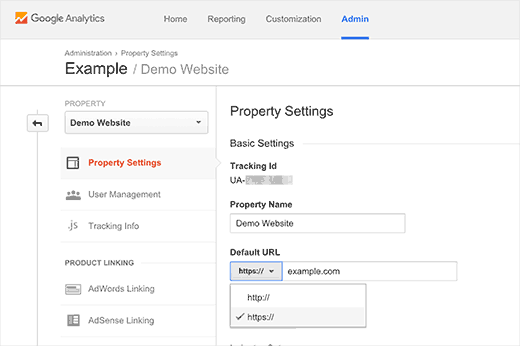
Don’t forget to click on the save button to store your settings.
That’s all, we hope this article helped you add Free SSL in WordPress with Let’s Encrypt.