

Elementor page builder has a huge collection of Google Fonts that you can use to choose fonts for your website.
However, sometimes, you may want to upload custom fonts in Elementor. Fonts that are not available on Google Fonts.
So, how do you add custom fonts to Elementor?
This is exactly what I’m going to show in this tutorial.
But before we begin this tutorial, here’s what you need to know about Elementor custom fonts.
Things You Need To Know About Elementor Custom Fonts
Custom fonts in Elementor are one of my favorite features of this page builder. This is because we ourselves use custom fonts on our website.
Besides, the ability to use any font on your website is something freelance designers and agencies love.
Here are some things you need to know before adding custom fonts in Elementor.
Elementor Custom Fonts are available only in the pro version
Elementor custom fonts are only available in the pro version of the builder. The free version doesn’t come with this feature.
So, if you’re already using Elementor Pro, you can easily upload custom fonts to Elementor.
For free users, you’ll have to upgrade to the pro version which not only brings custom fonts but many other features as well which will be worth your money.
You’ll need the different formats of your font file
Since you’re uploading fonts for the web, you can’t just upload one format of the font and call it a day.
Elementor recommends uploading different formats of the font to ensure the font loads in all different types of browsers.
Here are the different font formats required by Elementor:
- Web Open Font Format (WOFF) – This is the most recommended font format for the web.
- Web Open Font Format 2.0 (WOFF2) – This is an improved version of the WOFF format with better compression.
- TrueType Fonts (TTF) – This format was developed by Apple and Microsoft and is used on our operating systems.
- Scalable Vector Graphics (SVG) – This format is required to support older versions of the iPhone and other mobile devices.
- Embedded OpenType Fonts (EOT) – This format is required to support older versions of the Internet Explorer.
But what if I have only one format of the font?
No need to worry. There are many web font generator tools that let you upload your font and they’ll generate the different formats of the font file.
One such tool is Transfonter. With this tool, you just upload your font and select the desired formats you want to generate.

The tool will then automatically generate different web font formats that can be downloaded.
You’ll have to upload different variations of your font
Fonts come with different variations such as bold, italic, heavy, etc. Make sure you upload all the variations of the font in Elementor.
This is because you will need these variations for different use cases. For example – On headings, you might use a variation that has a large weight such as Bold or Extra Bold.
Similarly, you might also need the italic variation of the font in some places on your website.
Different font variations such as bold, thin, light, or heavy have different font weights assigned to them.
And in Elementor, you can select the weight of the font you’re uploading. But how do you know which font has what weight?
In CSS, the different font weights correspond to the following weight names:
- 100 – Thin (Hairline)
- 200 – Extra Light (Ultra Light)
- 300 – Light
- 400 – Normal (Regular)
- 500 – Medium
- 600 – Semi Bold (Demi Bold)
- 700 – Bold
- 800 – Extra Bold (Ultra Bold)
- 900 – Black (Heavy)
So, when you upload the fonts in the Elementor, make sure you select the right weight for the respective fonts.
Now you know all about custom fonts in Elementor. Let’s upload some custom fonts, shall we?
How To Add Custom Fonts To Elementor
Adding custom fonts in Elementor is a walk in the park. Here’s how you can do it:
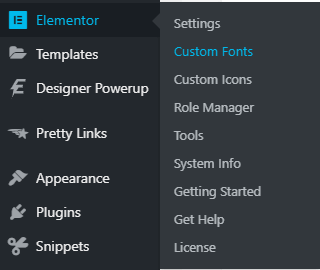
In your WordPress dashboard, go to Elementor > Custom Fonts. Then, click on ‘Add New’.
On this page, add the name of the font and upload the different file formats of the font.
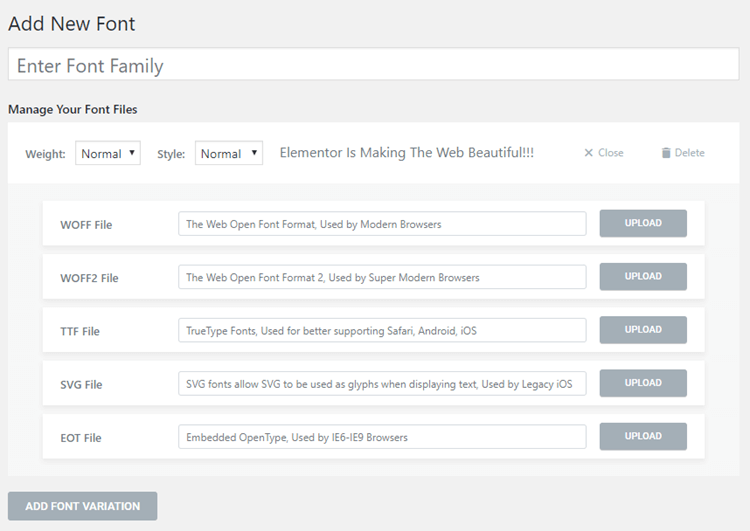
Also, make sure you select the right font weight for the font you’re uploading. You’ll have to upload each font variation individually.
There’s a button at the bottom named ‘Add Font Variation’ that lets you upload multiple variations of your font.
Once you’re done, save and go to the Elementor page builder to check if your font is being displayed properly.
You’ll find the custom fonts under the Custom Fonts category in the font picker.
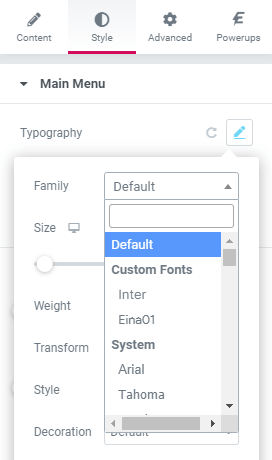
Apply the font on a text and also test if the different font weights are displayed properly.
That’s it.
Conclusion
As evident from the tutorial, it’s very easy to upload custom fonts in Elementor. Once you have all the font formats, all you need to do is just upload them.
But do ensure you upload the right font to its corresponding weights.