Looking to migrate Blogger to WordPress? We think WordPress is a great choice to run your website, but you might naturally be a little worried about whether you’re going to lose all the content on your Blogger site if you switch to WordPress.
Thankfully, it’s totally possible to migrate Blogger to WordPress without losing your content. In this article, we’ll show you six steps to switch your site that will make sure you don’t lose your content when switching over.
What you need to consider when you migrate Blogger to WordPress
The heart of any blog is – of course – its posts. However, when it comes to exporting your content from Blogger to WordPress, there are a lot of additional elements you’ll also want to consider. For example:
- The rest of your pages.
- All images and assets displayed throughout your site.
- The URL structure for your blog posts.
In addition, you might also want to ensure your new blog preserves the style of the old one for consistency. This is usually the trickiest part, as most platforms don’t enable you to export layouts and designs at all, let alone on a like-for-like basis. However, don’t panic – we’ll cover the entire process in the next section.
How to migrate Blogger to WordPress (6 steps)
Once you’ve got a fresh WordPress install ready to go, you’re ready to start migrating…
1. Export your Blogger content
Fortunately, Blogger makes this step simple by providing you with a backup tool you can use to download copies of your full website. These backups come in .xml format, which is perfect for importing large numbers of posts.
To get started, access your Blogger dashboard and jump to the Settings tab. At the top of the page, you’ll find a button that reads Back up Content within the Content (pages, posts, and comments) section:

Click on this button, and Blogger will ask you to confirm if you want to save a backup file to your computer:
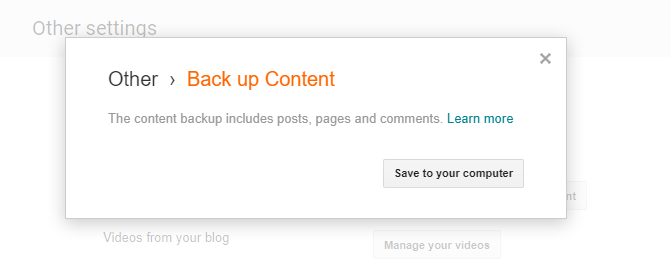
Confirm your decision and a download will start, which shouldn’t take all that long (even for large blogs.) When the download is over, take note of where you saved your blog’s .xml file – you’ll need it for the next step.
Finally, note that despite what the Blogger backup tool says, it will only export your posts and comments. As far as your pages go, we’ll cover how to move them later.
2. Import your Blogger content into WordPress
Next, open your WordPress dashboard. Then, go to the Tools > Import tab, where you should see a Blogger option at the top of the page. Click on Install Now under Blogger to get started:

WordPress will take a few seconds to install the importer tool. When it’s ready, you’ll see a new Run Importer option under Blogger (where Install Now was.) Click this, and on the next page use the Choose File button to locate the .xml file you downloaded from Blogger in the first step:

Run the importer and wait for WordPress to process your data. You’ll eventually be asked which existing authors you want to assign your imported Blogger content to:
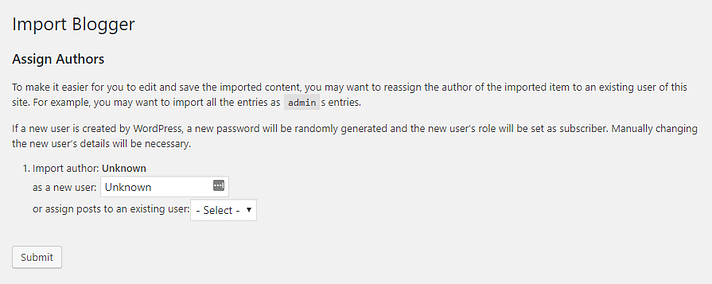
You can either set up new users now, or assign the imported articles to existing users. Note that if you had multiple authors on Blogger, you’ll get the option to assign their articles to different users at this stage.
When you’re done assigning articles, click on the Submit button. If everything goes well, you’ll see a success message – at which point you’ll be able to browse your imported posts within WordPress:
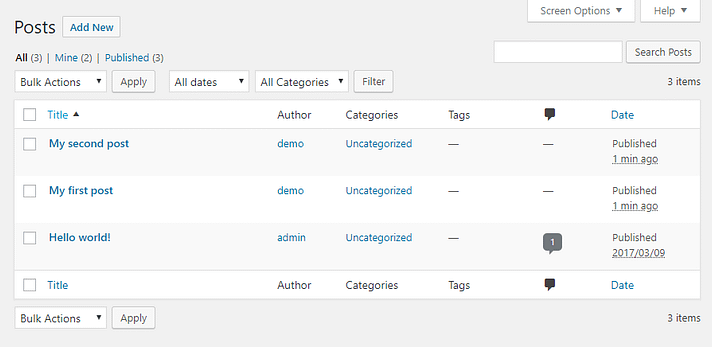
However, as we mentioned, Blogger only exports your posts. That’s great, as they’re the primary consideration for any blog. However, this means you have to deal with pages separately.
3. Move your Blogger pages to WordPress
Importing your Blogger pages to WordPress takes a bit more work than with posts, as you need to do so manually. To get started, return to your Blogger dashboard and move to the Pages tab.
Now, choose the page you want to export and open it using the Blogger editor. Once you’re in, switch to the HTML tab using the button under the page’s title:
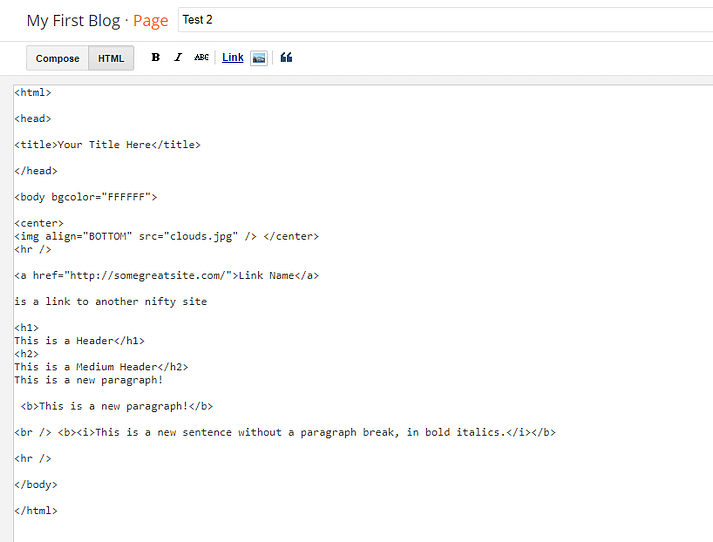
We’re going down the direct route here – simply copy the entire HTML and paste it into a fresh WordPress page.
Using the WordPress Block Editor, you can add HTML directly by clicking on dotted menu on the right-hand side:
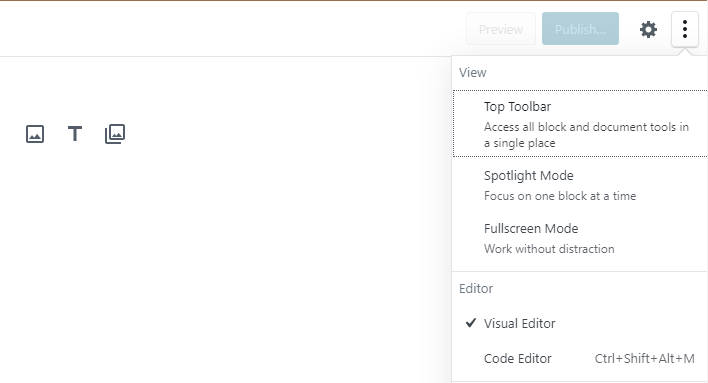
You can then paste the HTML as you would any other content:

When you’re finished, you can preview your page in WordPress before saving it. We’d suggest importing the content in its entirety though before tweaking the way it looks. All that’s left now is to repeat this process for your other Blogger pages.
4. Try to match your Blogger design
As you’ll probably notice, your imported pages may have the same content, but they won’t look at all similar to how they did in Blogger. Unfortunately, while you can import simple HTML and CSS using the Block editor, you can’t copy your blog’s template.
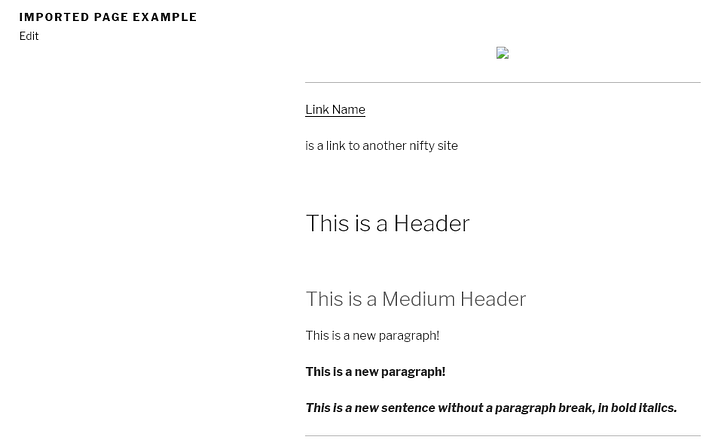
Once your Blogger content is in WordPress, you have two choices – either recreate your old Blogger design, or create a fresh new one with a modern WordPress theme.
The choice is up to you, although revamping your design will see you asking questions such as whether you should use a free or premium theme, the considerations you’ll need to make, and more.
Once you’re done tinkering with your blog’s design, there are still a few technical loose ends to wrap up the migration process.
5. Modify your WordPress URL structure so it matches Blogger
If you take a look at any of your Blogger posts, you’ll notice they have a pretty straightforward URL structure, usually yourbloggerwebsite.com/2020/06/your-blog-post.
This structure contains date information and it’s pretty easy to understand, so it’s almost perfect. The task here is to modify your WordPress URL structure so it’s as close to Blogger’s format as possible, so your search engine optimization (SEO) benefits aren’t lost.
To do this, open your WordPress dashboard and go to the Settings > Permalinks page. You’ll see all the permalink options WordPress offers. While the Post Title option is usually recommended, you should go with the Blogger-like Month and name:
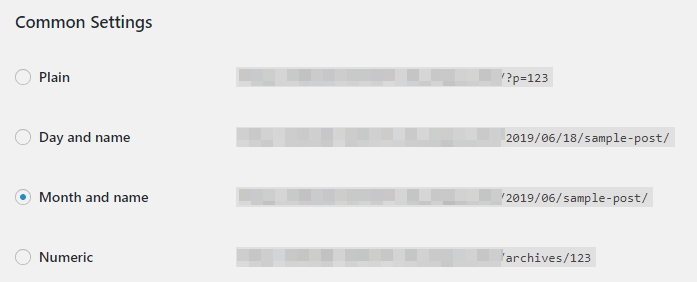
After saving your changes, you’re good to go, and there’s just one more step remaining before you can call it a day.
6. Redirect your Blogger traffic to WordPress
If you’ve been working hard on your blog for a while, you will already have an audience. A lot of those people will continue visiting your Blogger website of course, so the best thing you can do is redirect the traffic to WordPress. To do so, you’ll use the Blogger to WordPress redirection plugin:
Once you install and activate this plugin, a new Blogger to WordPress Redirection option will show up under your Tools tab. Click it, then select the Start Configuration button:
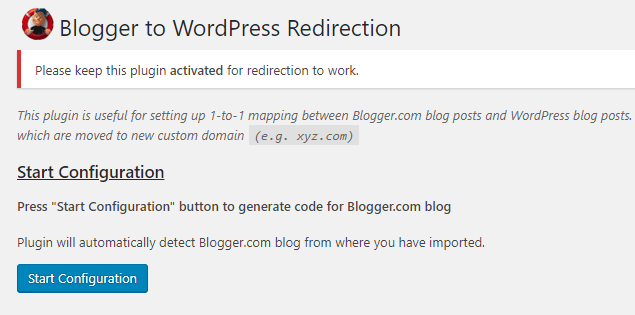
If the plugin finds imported content from Blogger, it’ll give you an option to generate a snippet of redirection code:

Copy the code that shows up, then return to Blogger. Open the Theme tab in your Blogger dashboard and select the Edit HTML button under your site’s preview:

A new page will show up that includes all of your theme’s code. You can go ahead and delete everything, then replace it with the code snippet you copied from WordPress.
However, note that after you do this, your entire theme settings on Blogger will be gone. Make sure your totally done with your Blogger site and have moved all your content already, or things can get tricky to fix. Once you save the changes to your theme, that’s it.
The next time your Blogger website has a visitor, they’ll be automatically redirected to the same page on your WordPress site.
Conclusion
Blogger has plenty of positives, such as how easy it is to use. However, its limitations quickly begin to show after your blog starts to grow. In contrast, WordPress can be at your side to help evolve your blog into almost anything you want.

