

On July 12, 2022, Microsoft will end support for its popular SQL Server 2012 software. As this date approaches, updating to SQL Server 2019 or migrating to the cloud is critical for organizations with valuable, sensitive, or business-critical data. Therefore, Microsoft will not patch SQL Server 2012 for new vulnerabilities and will not support organizations experiencing errors or bugs after implementing SQL Server 2012.
It may seem challenging to migrate business-critical databases because it requires tremendous preparation and expertise. However, you can implement a few best practices to reduce the amount of work involved with SQL Server Migration and, simply put, to reduce the amount of stress.
This article will describe the SQL Server Migration process and how data migration tools, such as Database Migration Assistant Tool, will assist in accessing, planning, for SQL Server Migration.
What is SQL Server Migration?
Microsoft SQL Server database migration involves moving data to or from a database. Some reasons for moving a database or restoring it include:
- Moving to a new server.
- Switching from one instance of SQL to another.
- Setting up a development server.
- Restoring a backup database.
Steps Involved in Migrating Databases
Typically, there are four significant steps involved in migrating databases:
- Extraction: Obtaining data from a source server or database and sending it to an intermediate server.
- Standardize: Compatibility issues with the data type could be resolved by matching the source to the destination formats, while metadata could be captured accurately.
- Aggregate and Cleanse: This process entails de-duplicates records and/or calculating derived fields.
- Load: Moving the processed, aggregated, and transformed data into the target database.
For accurate data migration, each stage must be carefully planned and tested before execution. Unfortunately, this process is quite time-consuming, mainly if you write your own code and stored procedures and design your internal data migration process.
So, a better strategy would be to use an enterprise-grade data migration tool such as Microsoft’s database migration assistant tool (DMA) to save time and reduce the likelihood of errors.
SQL Server Migration using Microsoft’s Database Migration Assistant Tool
Our discussion in this section examines how DMA can be helpful for the initial assessment of SQL Server Migration before it is actually carried out. Using Database Migration Assistant, you can evaluate, plan, and execute an on-premise or cloud upgrade of older versions of SQL Server, starting with SQL Server 2005.
SQL Server Migration: Using Database Migration Assistant
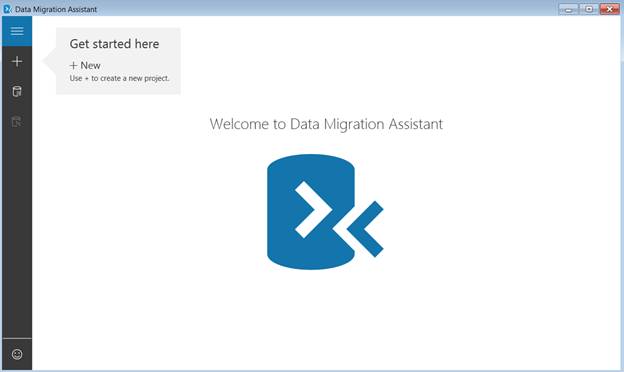
- After installing DMA, you will see the screen below when you run DMA on either a client or server machine. Then, on the left side of the screen, click the “+” sign. If this is your first time opening the wizard, you must create a new project. The interface at startup looks like this:
- Once you click the “+” button, a form for selecting an assessment or migration task will appear. Here we will choose assessment since the migration itself is not yet underway. However, analyzing the reports and examining all the facts are essential steps before starting the actual migration.
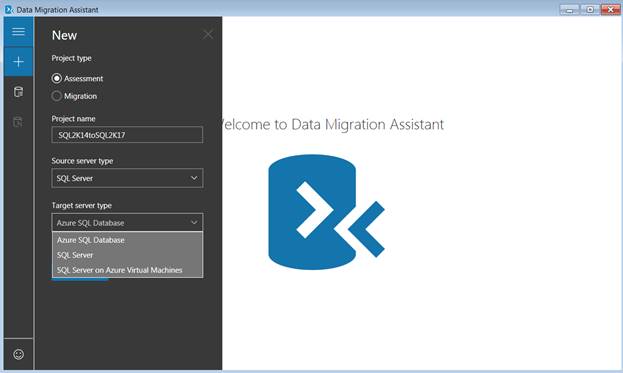
- Select the Assessment option and give it a name to create a project. For example, SQL2K14toSQL2K17 has been used by me.
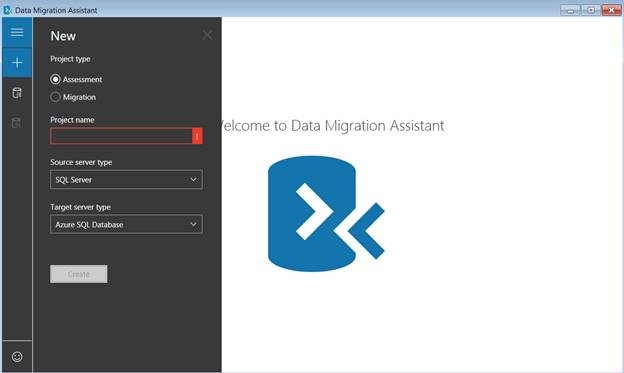
- The next step is to select the type of server you want to use for the source and target:
Source Server Type refers to the kind of data source you plan to migrate. As you can see, I selected SQL Server. Other data sources can be migrated using the SQL Server Migration Assistant (SSMA) or Azure Database Migration Service (DMS).
Target Server Type specifies the type of SQL Server to use, either SQL Server or Azure SQL Database. I chose SQL Server.
- Click on the “create” button at the bottom of the screen once you have completed all the options.
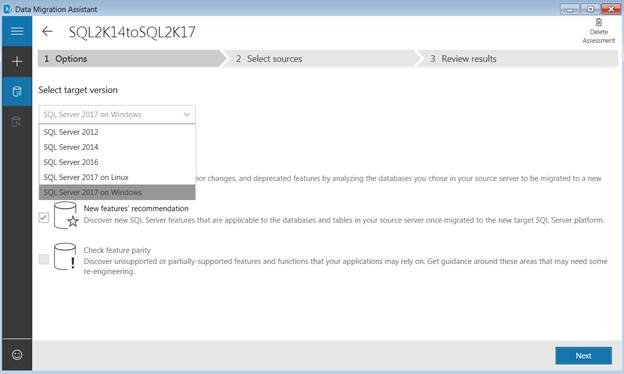
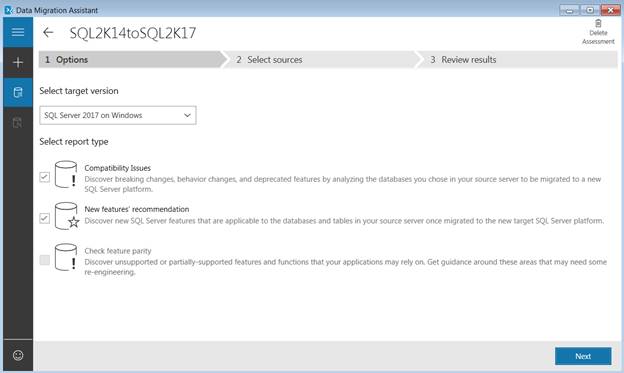
- If you want to recommend new features and fix compatibility issues, you can check the boxes. There is no check box for Check feature parity when the drop-down selection is selected. If you choose “SQL Server 2017 on Linux” from the drop-down list, the Check feature parity check box will be enabled:
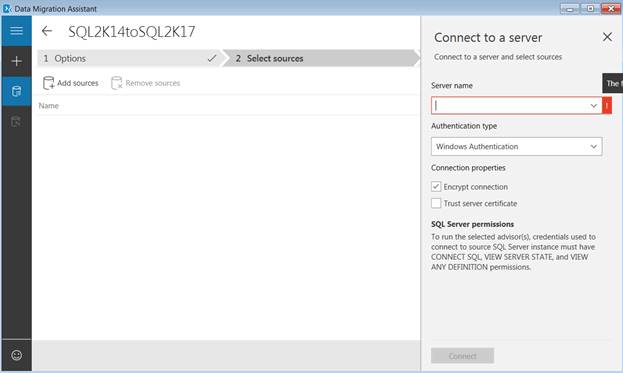
- You will need to connect to the Source SQL Server and enter the server details and authentication type. In addition to supplying the required information, you must ensure that the encryption connection is enabled in SQL Server. You will need to uncheck the checkbox on the given screen if the encryption connection is not allowed.
- At the bottom of the screen, you can see the permissions required for successful assessment on SQL Server instances.
- To connect the source SQL Server, click the “Connect” button:
- When it connects successfully, it will show you all the available databases on the server. First, select the database(s) you want to migrate. Then, depending on your needs, you can either choose one database at a time or all the databases together.
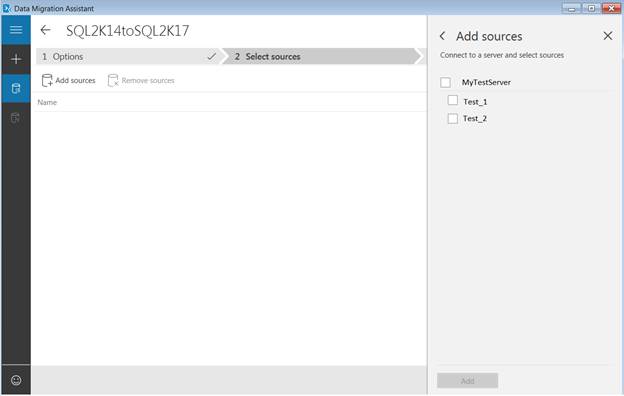
As part of the assessment, I selected both databases available on my test server. Then, I land on the next screen after clicking the add button, which will begin the migration assessment.
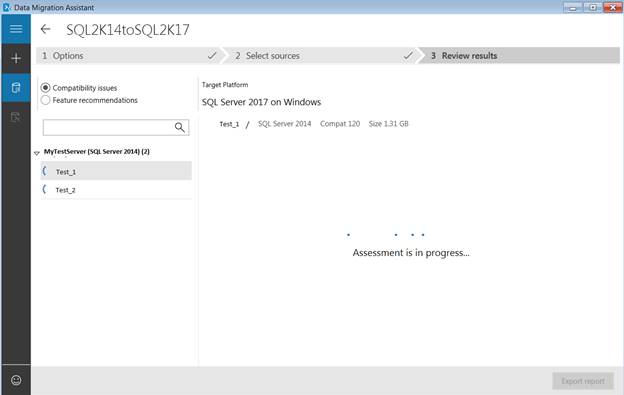
Based on the size and number of databases to be assessed, the assessment may take a while. Therefore, the Database Migration Assistant will take a moment to return the results of this assessment. During that time, you can observe whether a compatibility report will appear or if a feature recommendation will be shown, and whether you will be able to search for specific databases. You can find these filters under the left-hand column:
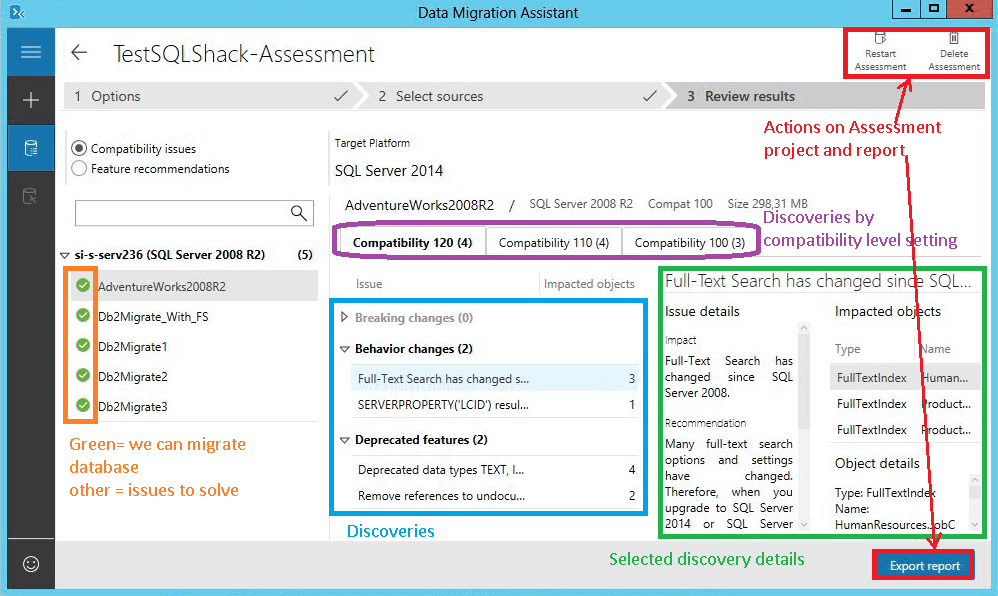
As soon as everything is completed, you see that the assessment report is divided into multiple sections.
A visual indicator on the screen immediately lets you know if a database can be migrated (orange rectangle in the following screen capture). Similarly, the tool runs an assessment task for each compatibility level option from the current one to the one corresponding to the destination’s SQL Server version (zone shown in purple on the following screen capture).
In addition, for each compatibility level, we will see what the tool discloses in terms of breaking changes, behavior changes, and deprecated features, and we will be able to click on each discovery to get a more in-depth description, as well as what objects are affected (circled in green in the screenshot). Last but not least, we can perform these three actions in Database Migration Assistant:
- Start over with the assessment.
- Delete the assessment results
- Export the assessment report (as JSON or CSV)
SQL Server Migration: The Migration Process
- On the left sidebar, click the “+” button to create a new project, but this time for migration purposes.
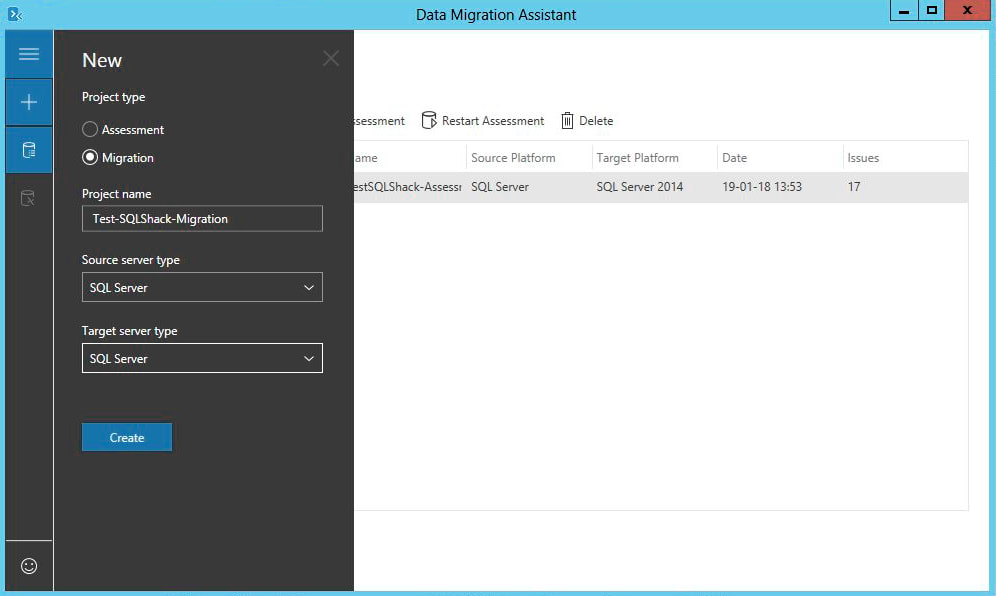
- We will now click the “Create” button, and we will be directed to a form where we can enter the details of our source and target server connections. Finally, we can click on the “Next” button when we are done.

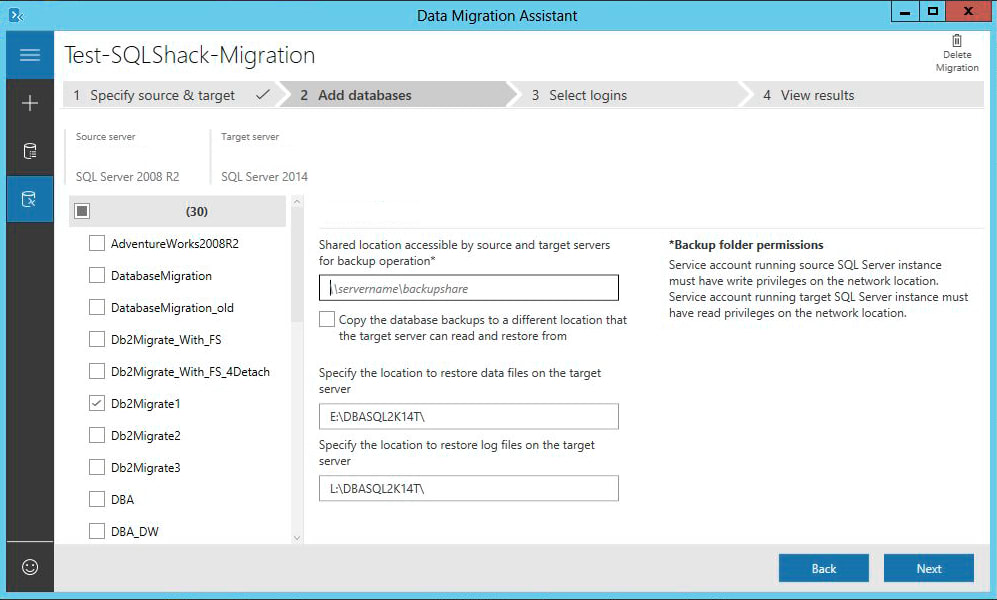
- Again, note the text in the “SQL Server permissions” area that specifies the exact permissions the tool requires to operate as expected. DMA will then ask for a list of databases to migrate if the credentials provided are correct and connect to the source and destination server instances. Using the backup-restore method, Database Migration Assistant will actually do the migration for you: as shown on the following screen.
The following parameters are intrinsic to the technique:
- The location of the backup files in the shared folder
- Data files’ destination path
- The destination of transaction logs
- The parameters listed here will be applied to all databases in the tree panel on the left. By clicking on a particular database in the tree hierarchy, we can specify different values for these parameters.
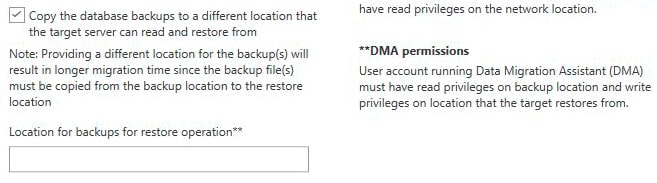
- On the right side of the screen, we see an option that tells DMA to perform a backup, then copy the backup files to a location accessible by the service account running SQL Server on the destination server.read. Clicking on that checkbox adds the following to the view:
- DMA asks us to specify which logins should be kept once we choose the databases to migrate and set the parameters for backup-restore migration. This tool checks for existing logins and tells you whether they are ready to be moved if they already exist or can’t be moved.
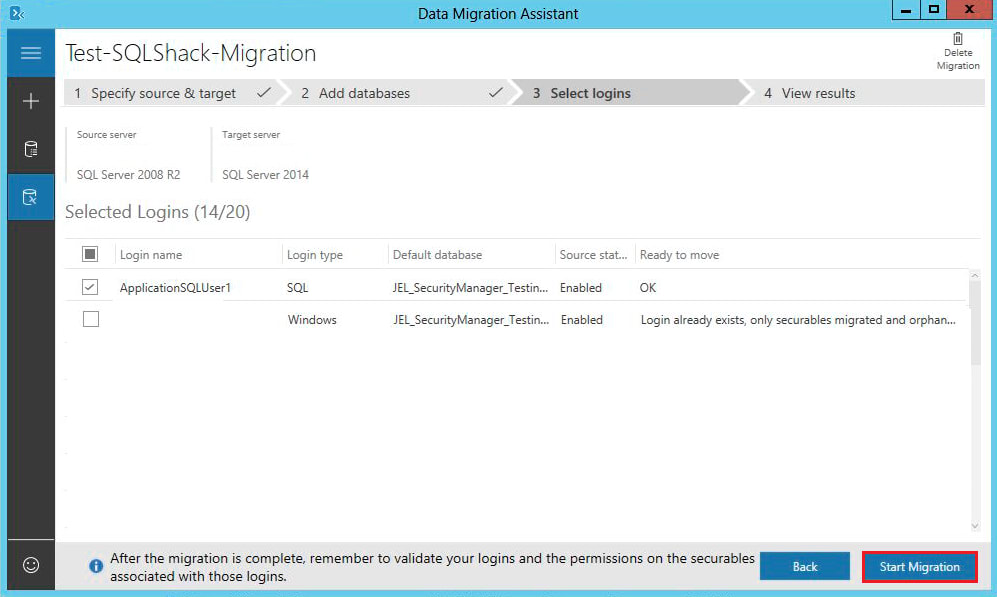
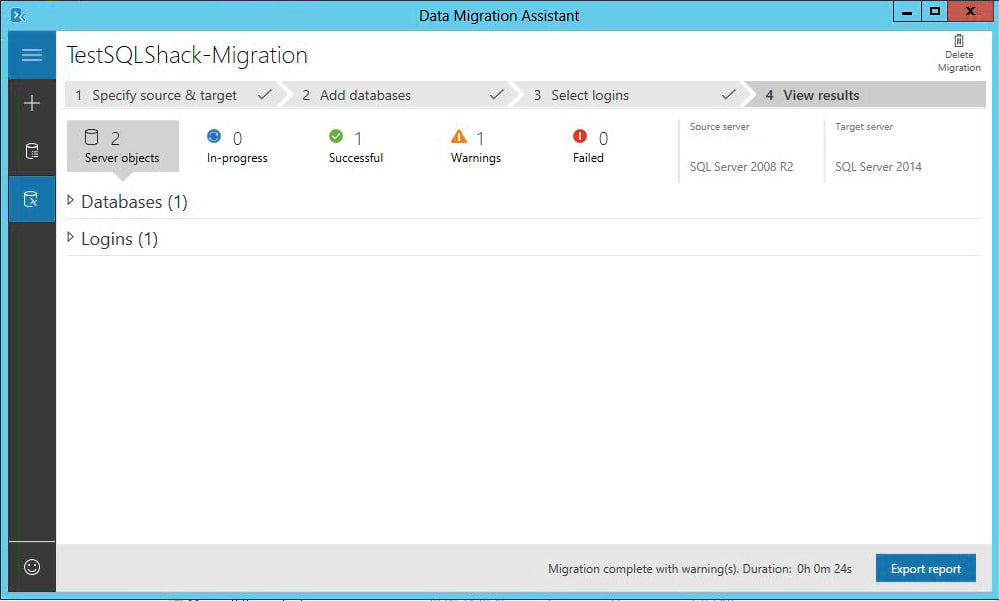
- We can click the “Start Migration” button once we are ready to begin our migration. You will be pleased to see the following view with 0 failed operations if the migration is successful:
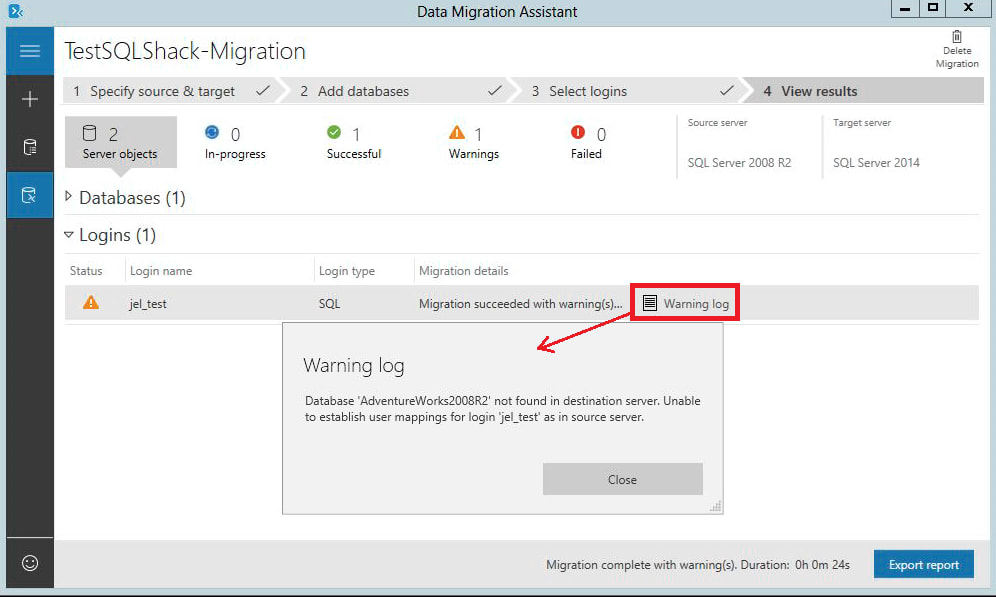
- In a “migration details” column, we can check the logging information for each object. Then, whenever something goes wrong (with warnings or errors), we can look at a detailed log:
Conclusion
Several factors motivate businesses to migrate their SQL databases. It could be for building a new Data Warehouse, overhauling your existing systems, or upgrading your database systems, for example. Therefore, it is imperative to carefully plan and test migrations when migrating data between a source and a target to avoid data loss.
An assessment of SQL Server Migration from an older version of SQL Server to a newer version of SQL Server was discussed in this article. Microsoft’s DMA is an effective tool for evaluating your SQL Server and migrating it to a higher version or newer version that will meet your organization’s requirements. Using this tool, it is possible to migrate to Azure SQL Database or on-premises SQL Server. After you review the published report from DMA and accomplish the remaining tasks of your master migration plan, you can trigger the SQL Server Migration and finish the project.