
The method to configure Magento email is no longer difficult. Use this guide to accomplish your task without any fuss. A complete email solution for Magento stores has become very important for store owners nowadays. It serves customers as a medium to remain in contact with store owners; know more about anything related to the store, or solve sales problems faster than ever.
However, Magento is a huge ecommerce platform, and if you don’t have adequate experience in development, it becomes a bit bothersome to configure Magento email settings. Before jumping into Magento email configuration, you must know that by default, the platform allows you to create up to five emails for the different targets such as General contact, Sales support, Customer support, Order Emails, Custom Emails etc.
As per the particular industry of any business, you can consider making proper emails according to your requirements. For instance, you can create some email addresses such as:
- For normal Contact Queries, you can have an email like contactus@yourdomain.com
- For Sales Support, sales@yourdomain.com
- For Customer Support, you can set an email like support@yourdomain.com
- For Order Enquiries, you can create order@yourdomain.com
- For Other Enquiries, enquiry@yourdomain.com
Magento also has an automated email reply system. You can link each identity and its email address to it. If anyone sends an email to order@yourdomain.com to inquire about any order, the automated email reply system in Magento will automatically reply with greetings and informs that someone from the order department will contact you as soon as possible.
I will show you the process to setup Magento email for both 1.x and Magento 2.x versions.
- Configure Magento Email Settings
- Configure Magento 2 Email Settings
Configure Magento Email Settings
You can configure Magento email settings with the following simple steps:
Before you configure any Magento email settings, you must have valid email addresses with your domain name. Follow the instructions from your hosting/server provider to create each email address that you wish to use.
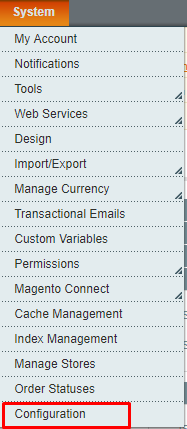
Open the admin panel of your Magento store. Navigate to System → Configuration:
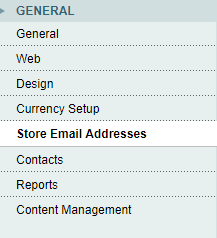
Click on Store Email Addresses under GENERAL:
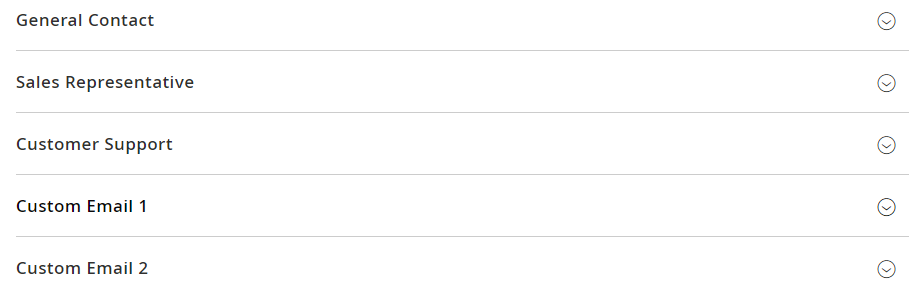
Here, you will see multiple sections for Magento email settings:
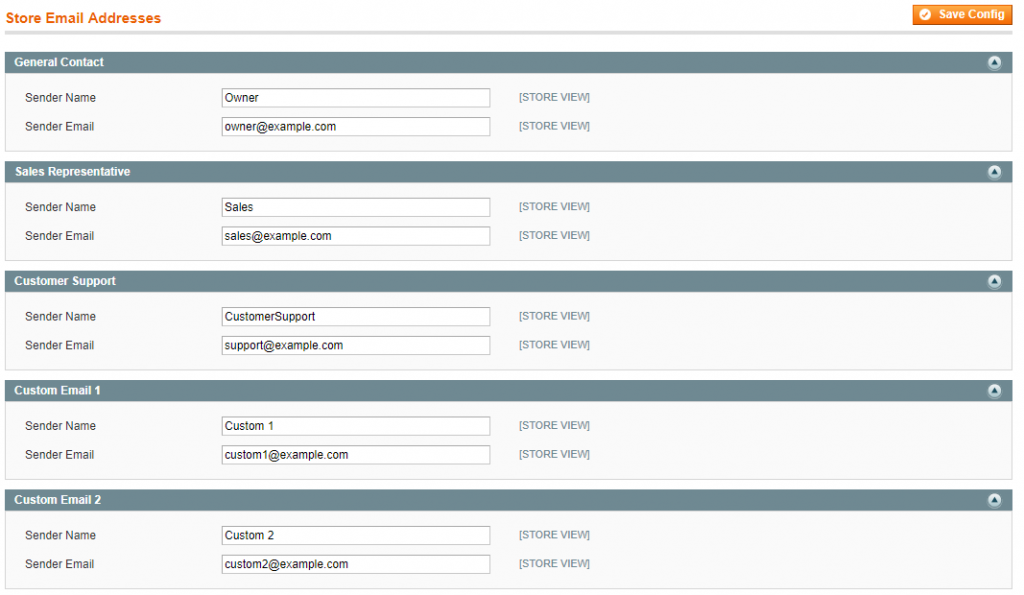
Now go to each section, and configure them as per your need. Each section has two fields:
- Sender Name: Enter the name of the person or name of the department to appear as the Sender of any email that is associated with the specific section or identity.
- Sender Email: Enter appropriate email address
Repeat this process for each store email address that you wish to use.
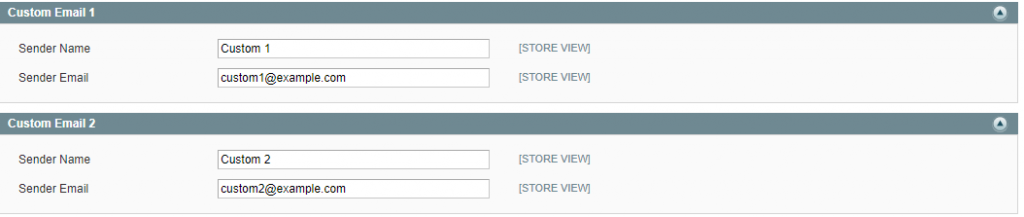
Also, If you want to add new email addresses, rather than using existing configuration, then you can use Custom Email 1 and Custom Email 2 sections:
Now, click on Save Config:

Magento email configuration is complete. Now let’s move to Magento 2.
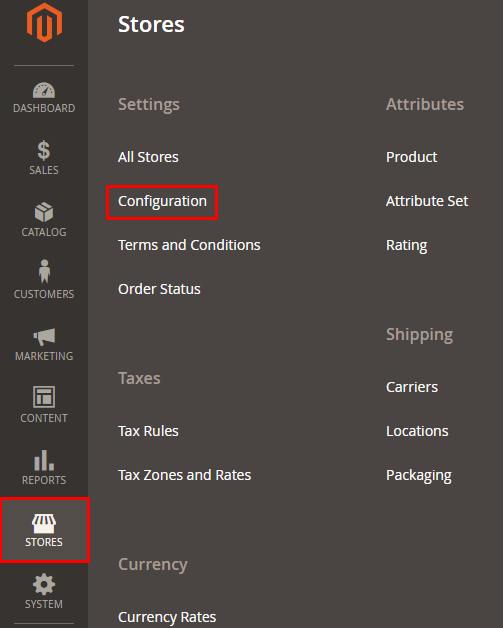
Launch the admin panel of your Magento 2 store. Navigate to STORES → Configuration:
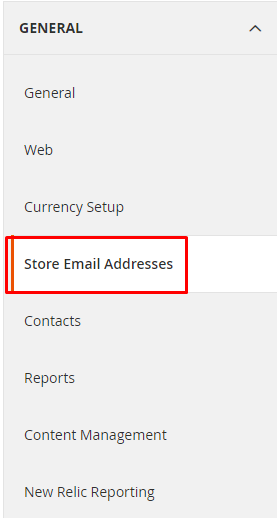
Click on Store Email Addresses under GENERAL:
Here, you will see multiple Magento 2 email settings sections; same as you have seen for Magento 1.x.
Now go to each section and configure your Magento 2 email settings in the same way as you have done for Magento 1.x.
Once done, just click on Save Config button:
That’s it. The Magento 2 email configuration is complete.